
Motion Blur: Whatever Is Doubled Is What Moved
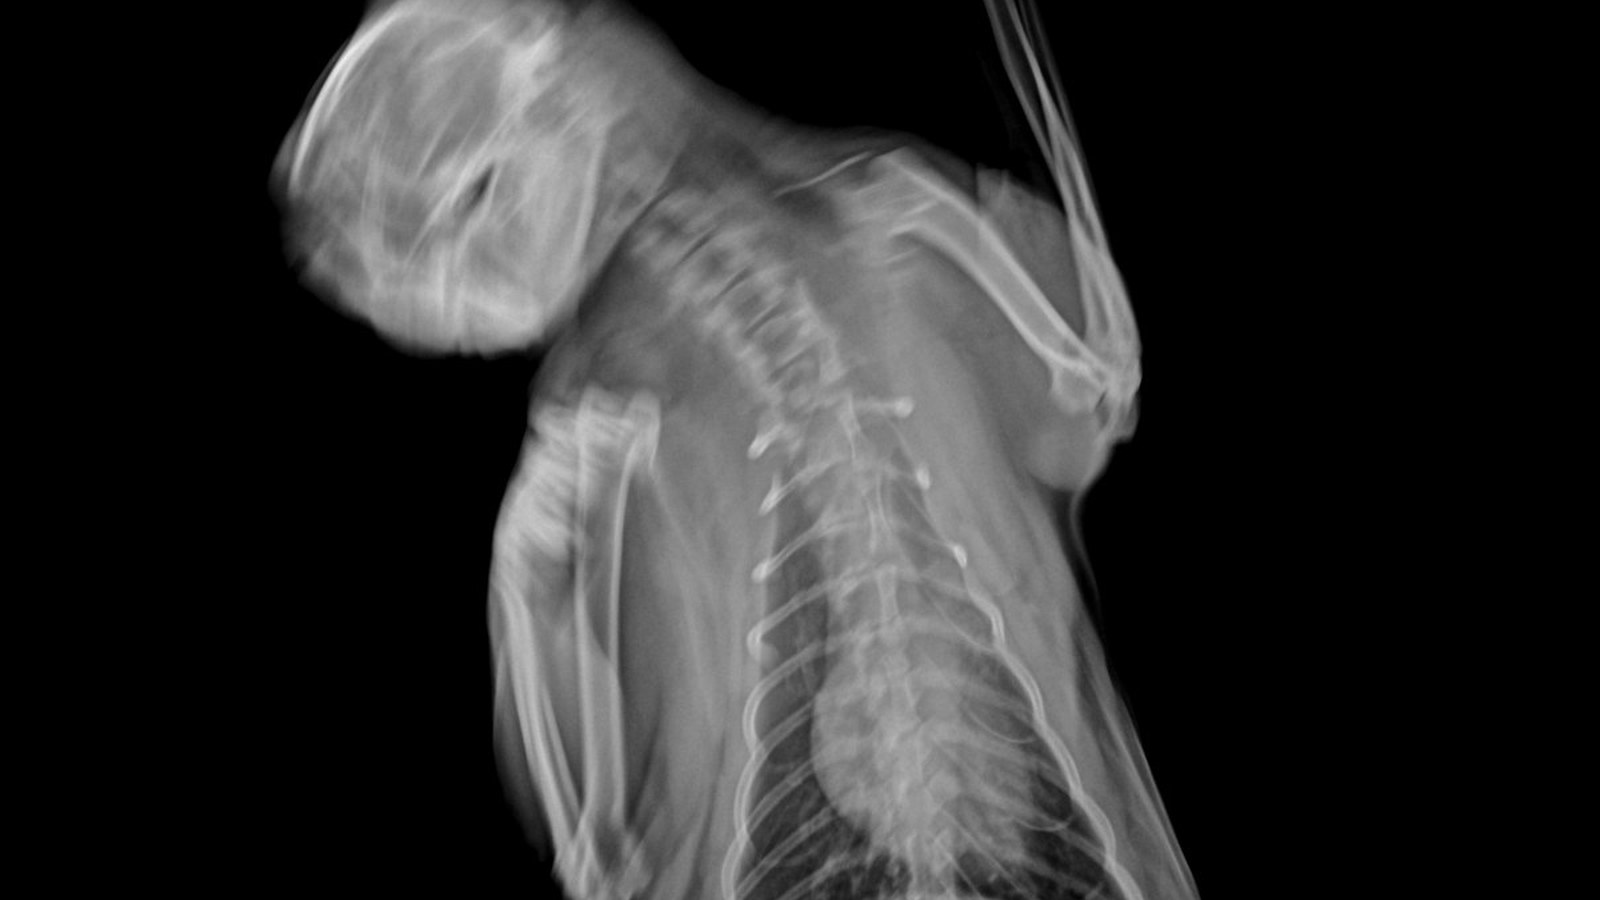
The spine can be counted vertebra by vertebra and the exposure is fine — yet the skull looks traced three times. The technique was not wrong: in those 26 milliseconds, the animal lifted its head.
 Veterinary imaging · Core software built in-house
Motion Blur:
Whatever Is Doubled Is What Moved
The spine can be counted vertebra by vertebra and the exposure is fine — yet the skull and mandible look traced three times over. The technique was not wrong: during those 26 milliseconds, the animal lifted its head.
Each article in this series looks at one genuinely bad image and discusses image quality only — never diagnosis. We start with the kind almost every clinic produces: everything looks right, and yet it is soft.
01Look at the image first: what is soft and what is not
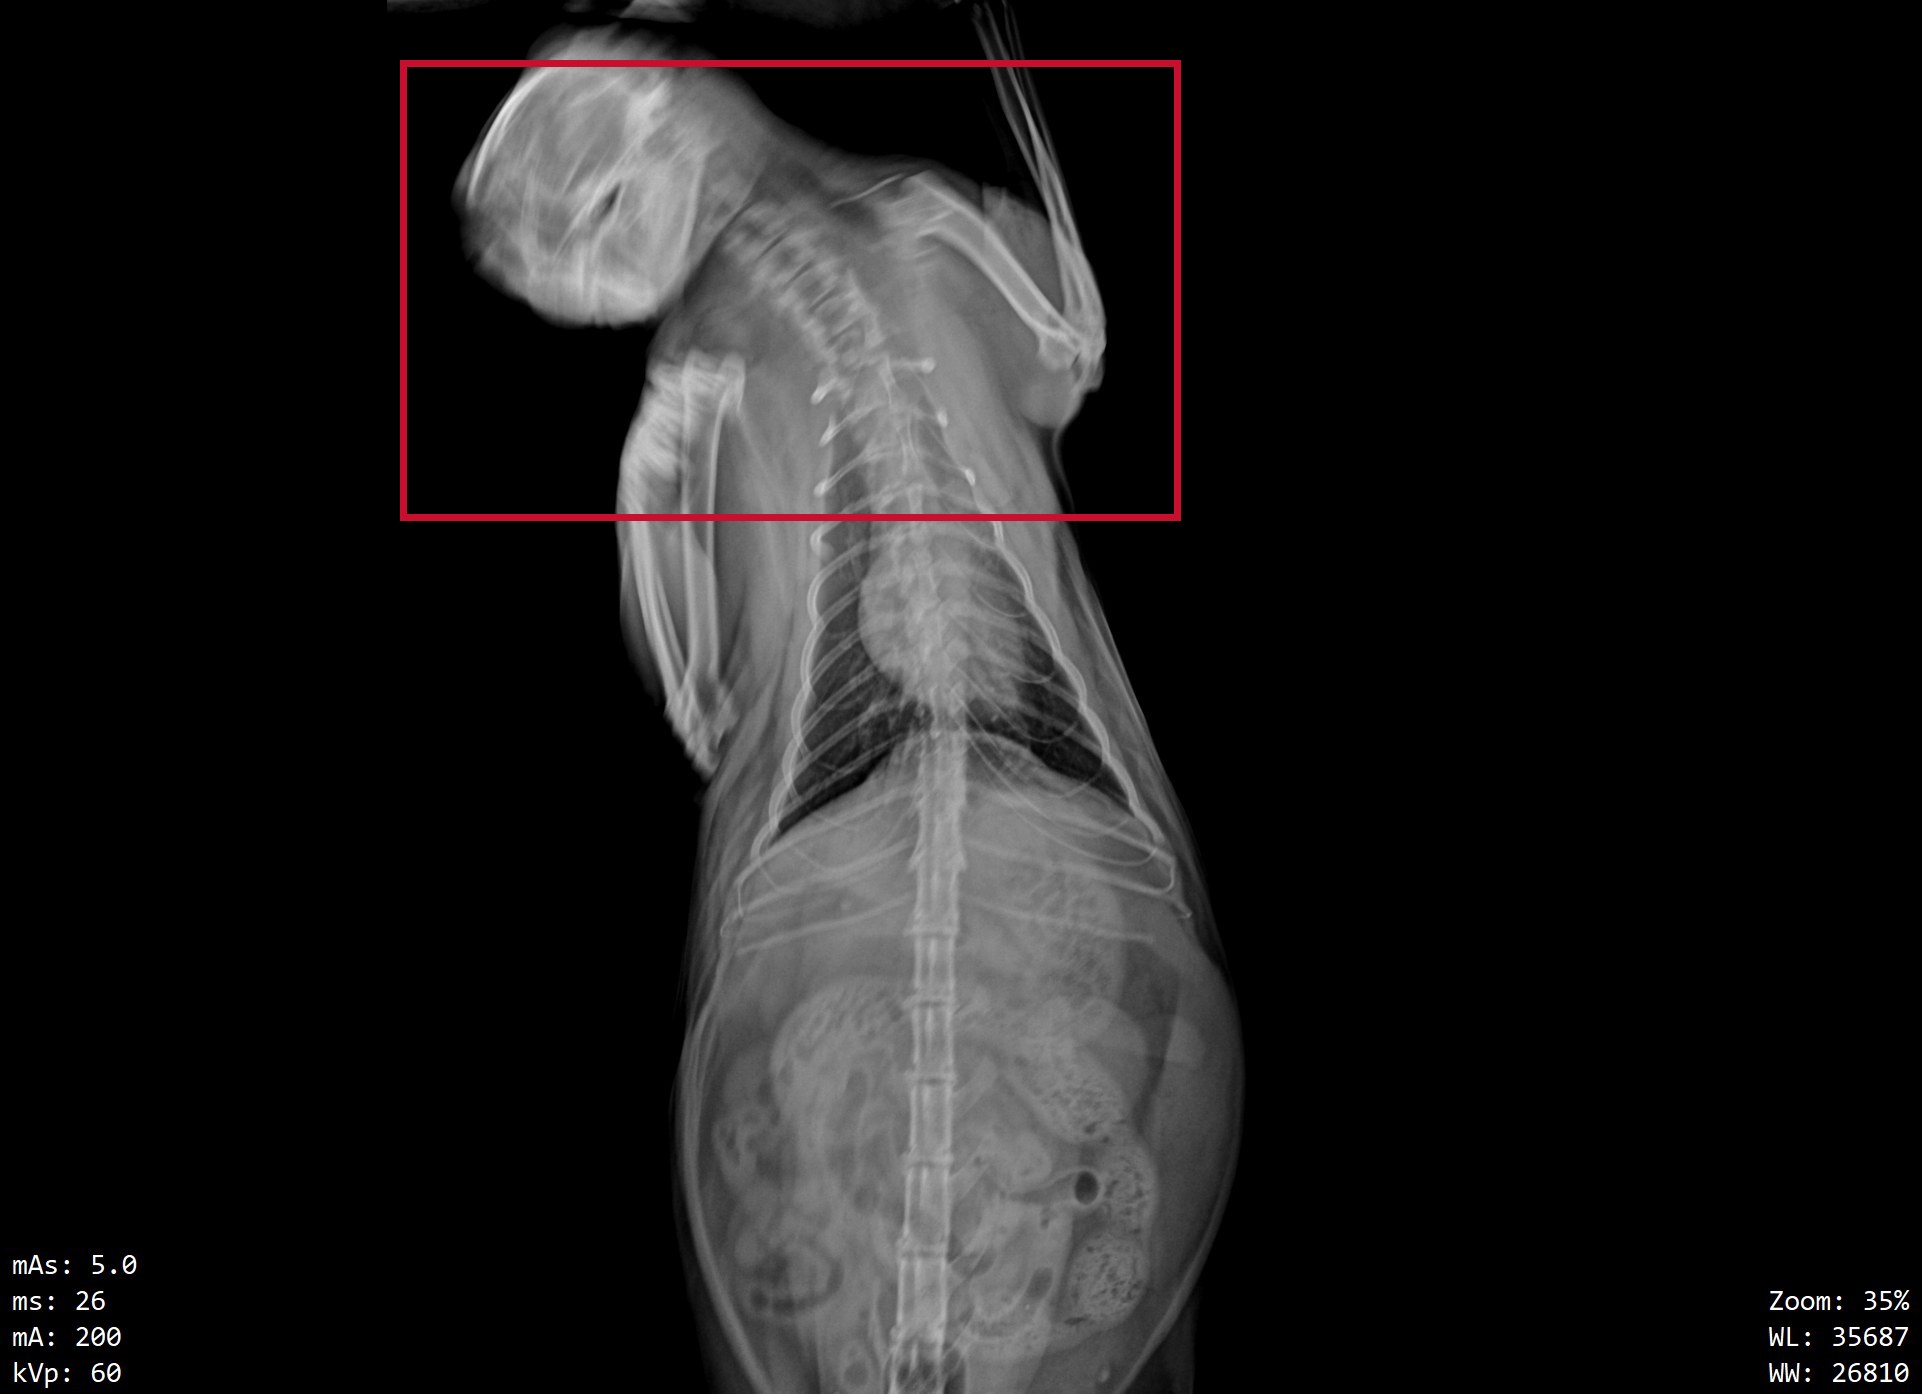
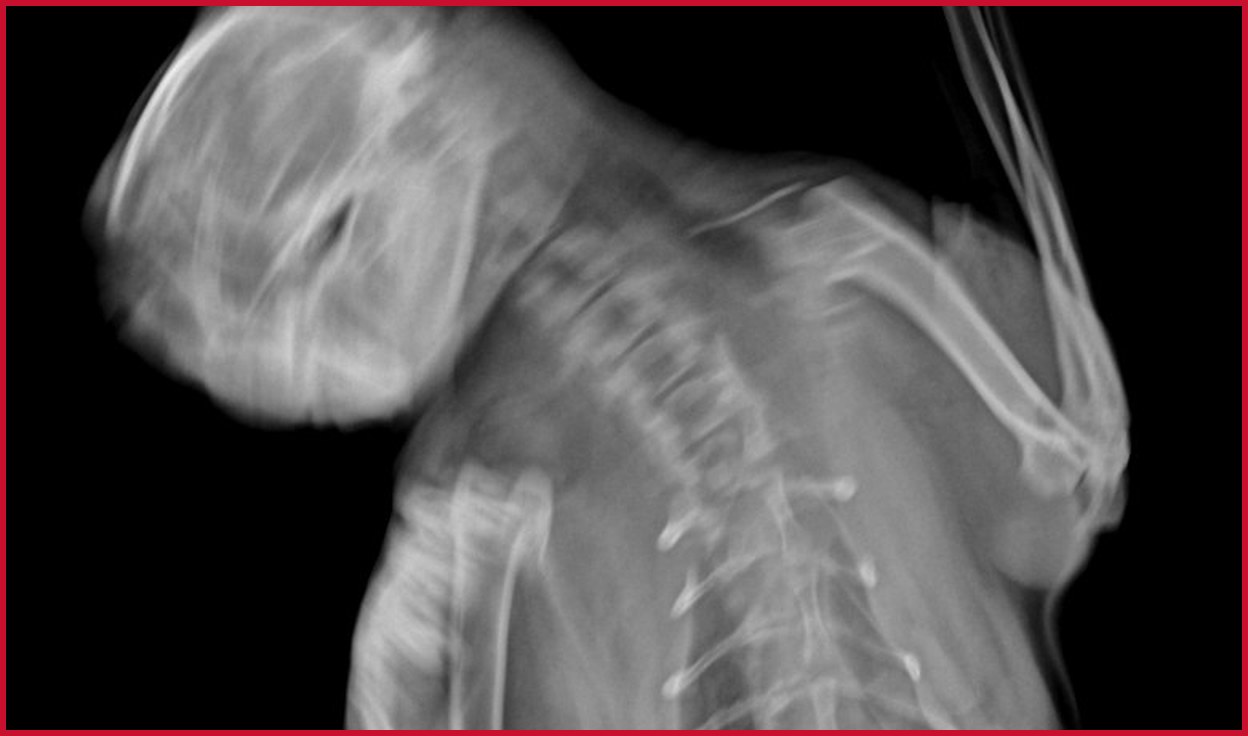
The spine can be counted vertebra by vertebra, ribs and abdominal detail are all there, and the exposure is adequate. But the head and mandible look traced three times over, and the forelimb trails several outlines — there is no single edge to the skull.
So were the settings wrong? The image itself says otherwise in the bottom-left corner: mAs 5.0, 26 ms, 200 mA, 60 kVp. Twenty-six milliseconds is not slow, and it still blurred. The settings are not the problem.
02Three kinds of blur, three different causes
Only soft tissue is soft; bone is sharp
The diaphragm, cardiac silhouette and gas shadows are blurred while bone edges stay crisp. The body did not move — what is inside it did: breathing and heartbeat.
Whatever region is doubled is the region that moved
Everything else stays sharp; one area trails multiple outlines. That is this image: head, neck and forelimb doubled, thorax and abdomen sharp — the animal raised its head at the moment of exposure.
Type 3: the whole image goes soft
Bone and soft tissue blur together, as if seen through frosted glass. Only this one means the whole animal moved — or that the tube or detector was not stable at the instant of exposure: a rocking table, an unlocked ceiling suspension, an uneven floor.
Do not reach for the technique chart
Of the three, only the third points at the equipment; the first two are about timing and restraint. The settings on this image were correct — changing them only buys the patient another exposure for nothing.
03Why 26 milliseconds can still blur
The exposure time on this image. It sounds short enough to ignore — but if the animal lifts its head within it, the shadow travels a measurable distance across the detector, and that distance is the double contour you see.
The principle is plain: an exposure takes time, even a few tens of milliseconds. During it the chest rises and falls, the heart beats, and the head can come up at any moment. The longer the exposure, the longer the smear. And cats and dogs have heart rates two to three times ours and breathe far faster — the same 26 ms that would be safe on a person becomes several outlines on a restless animal.
The most overlooked factor: when you press the switch
The seconds right after positioning, while the animal is still struggling and panting, are the worst seconds to expose. Many bad images are not mis-set; they are pressed too early.
04How to avoid it, in order of effect
① Wait for one quiet breath
Position the animal, keep your hands on it, watch the chest wall, and release at end-expiration or end-inspiration (whichever the view requires). This costs nothing and gains the most.
② Hold the part that needs holding
Whatever is doubled was not held — doubled head and neck means supporting the mandible and neck; a doubled forelimb means extending and securing that limb. Use sandbags, ties and troughs; sedate the truly frightened or painful patient. One good image beats three attempts on a struggling animal — for the animal too.
③ Shorten the exposure
Same mAs, higher mA, fewer milliseconds. The total stays the same, but a shorter time freezes the movement.
That third one is the half you do not control: whether the exposure can be pushed down to a dozen milliseconds and still collect enough signal depends on whether the generator can deliver the mA instantly and whether the detector can capture it that fast. Technique is one half; the machine is the other.
Work through those three steps and your retake rate falls faster than any parameter change will manage.
Whatever is doubled is what moved.
Only when everything is soft do you blame the equipment.
Source:The image comes from a real installed system, with header details cropped away; only image quality is discussed. Exposure values are read from the image’s own parameter bar (mAs 5.0 / 26 ms / 200 mA / 60 kVp).
IWA Medical · We build DR systems and write our own core software
Questions about veterinary DR imaging? Technical questions go straight to our engineers.