
The Collimator: The Cheapest Protection in the Room
That little box with a light under the tube head does exactly one thing: it shrinks the beam to the part that needs imaging. One move, three wins, zero cost — and most clinics underuse it.
 Veterinary imaging · Core software built in-house
The Collimator:
The Cheapest Protection in the Room
That little box with a light under the tube head does exactly one thing: it shrinks the beam to the part that needs imaging. One move, three wins, zero cost — and most clinics underuse it.
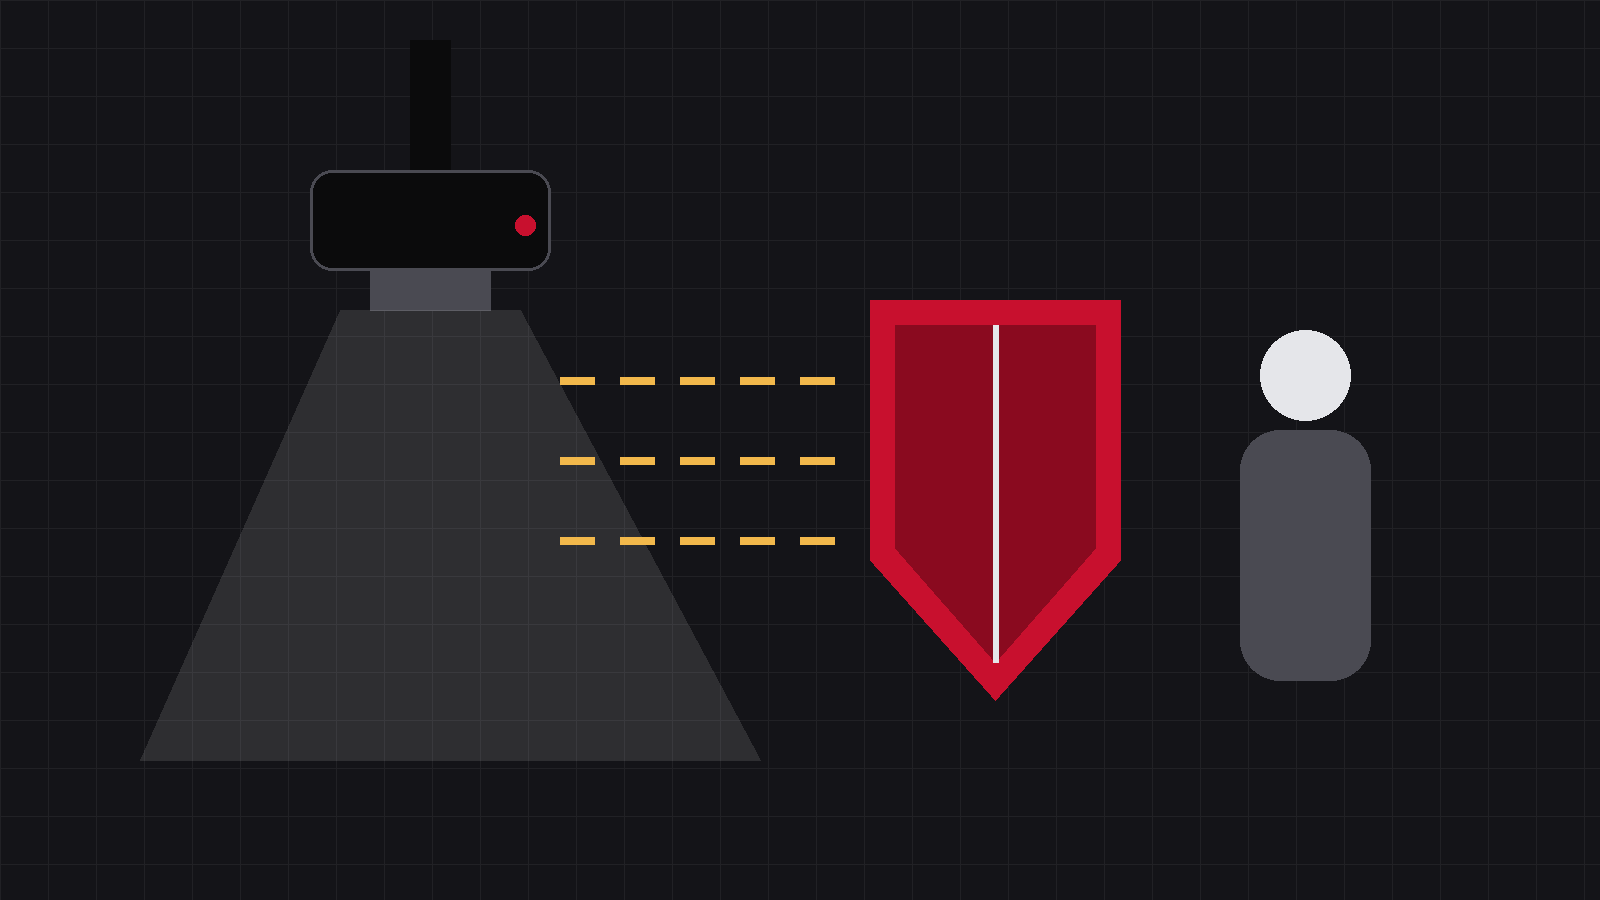
There is one component in every X-ray room that costs almost nothing, yet makes the image clearer, gives the animal less radiation and the people less scatter — all at once. And most clinics underuse it. It is the collimator: the box under the tube head with a light inside and four sliding blades.
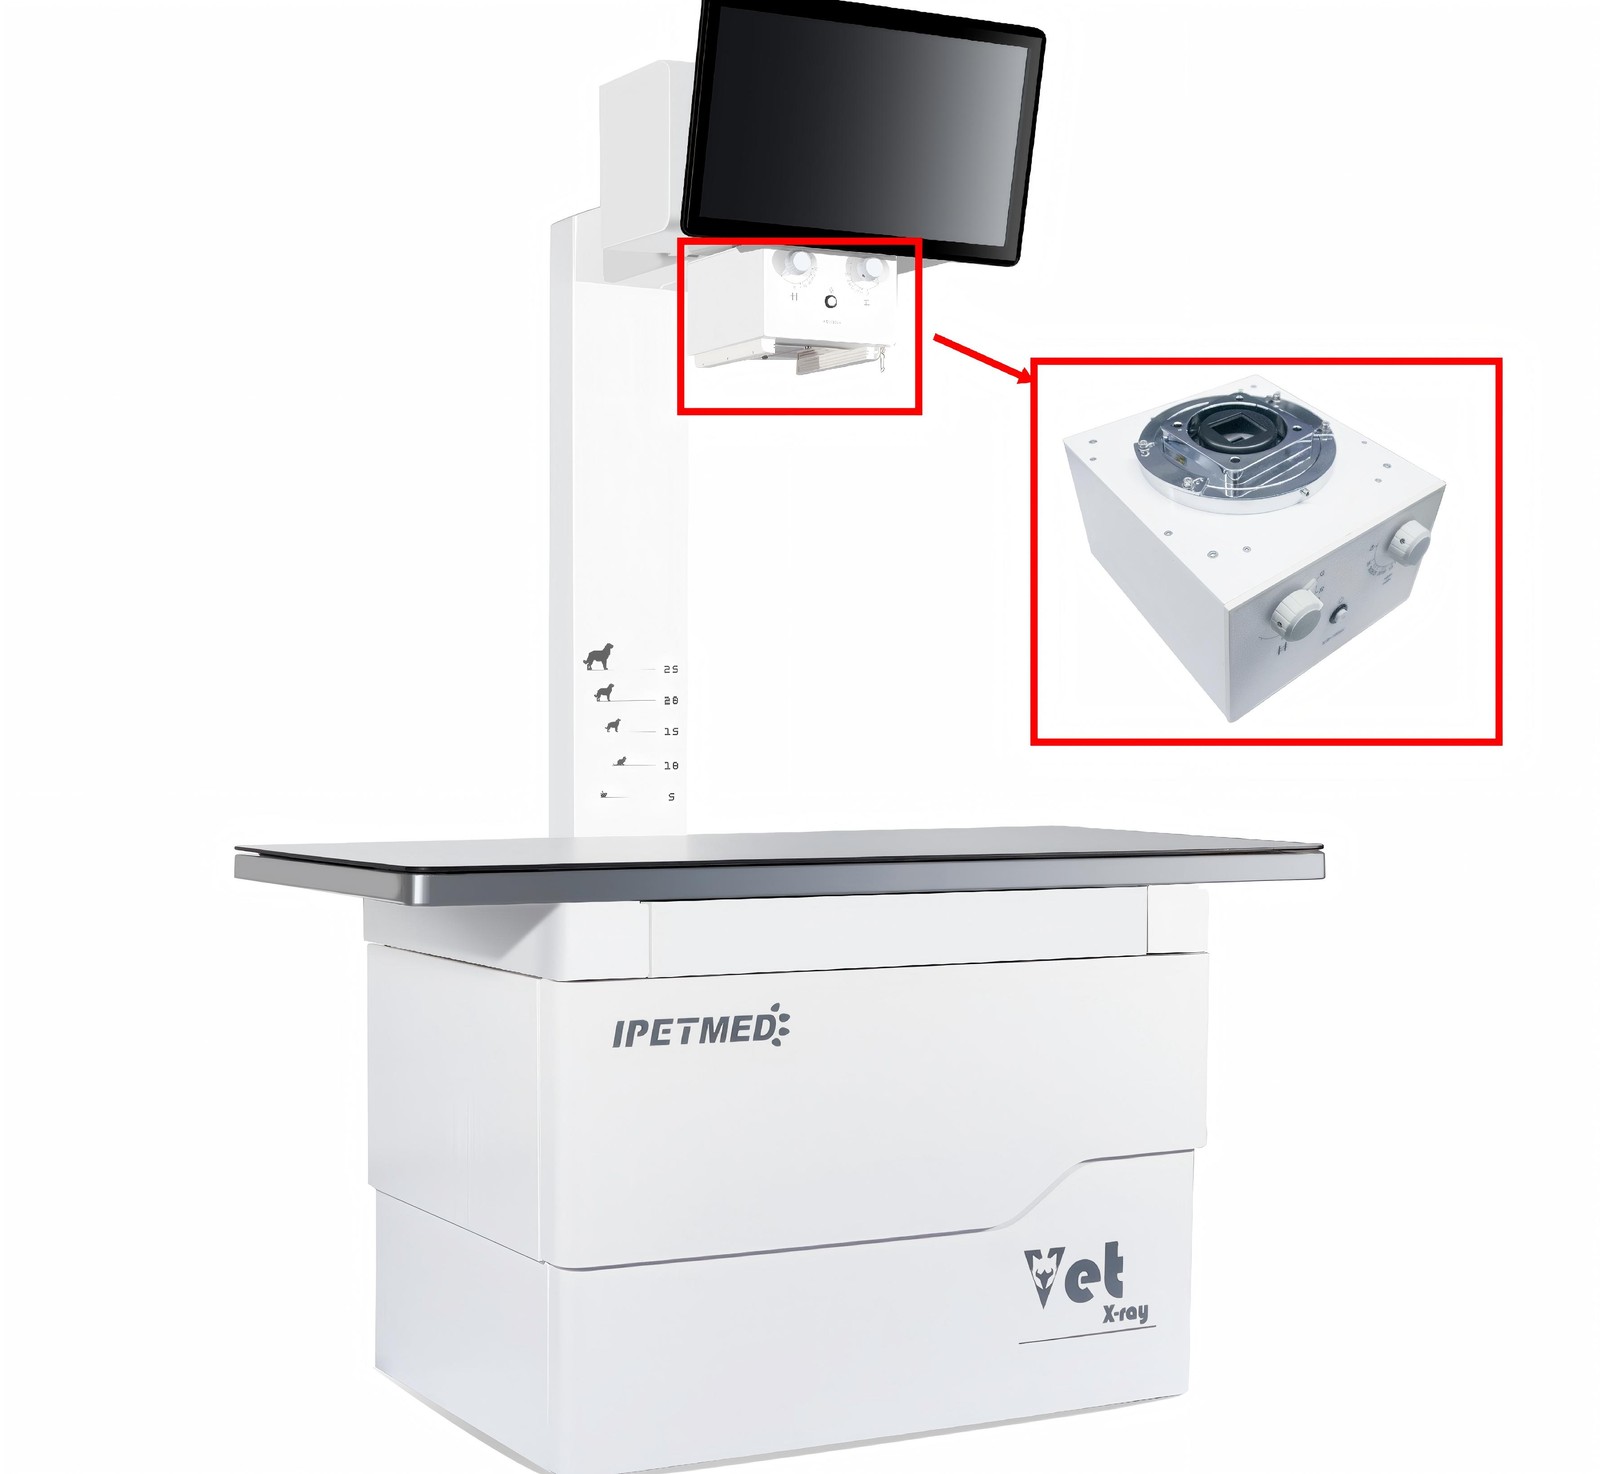
01It does exactly one thing
It shrinks the irradiated field to the part that actually needs imaging. That single move buys you three things.
First, a clearer image
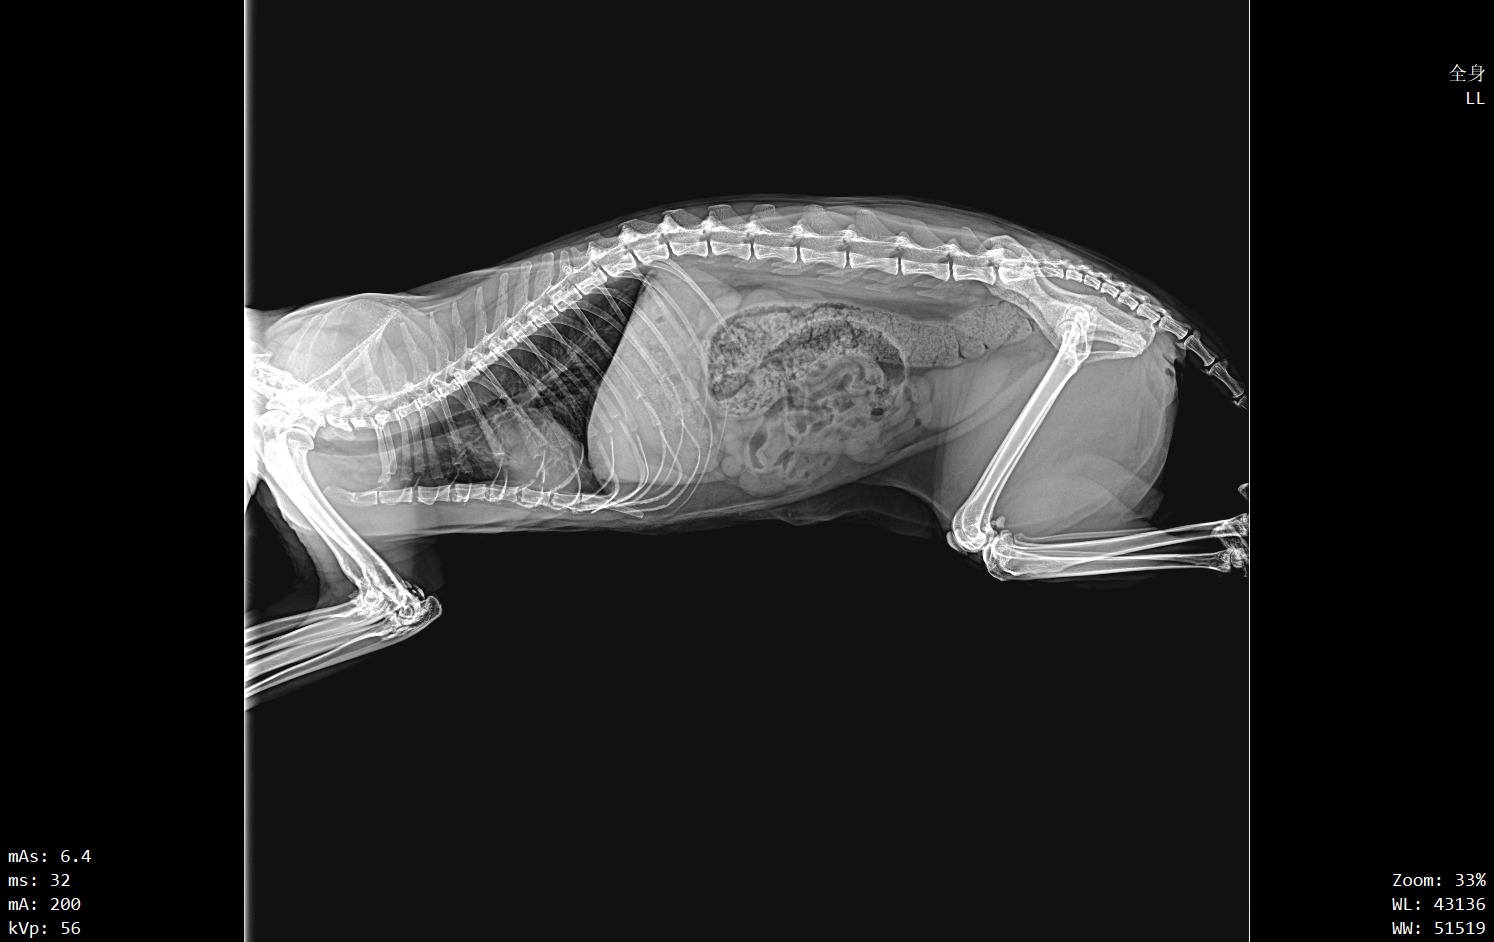
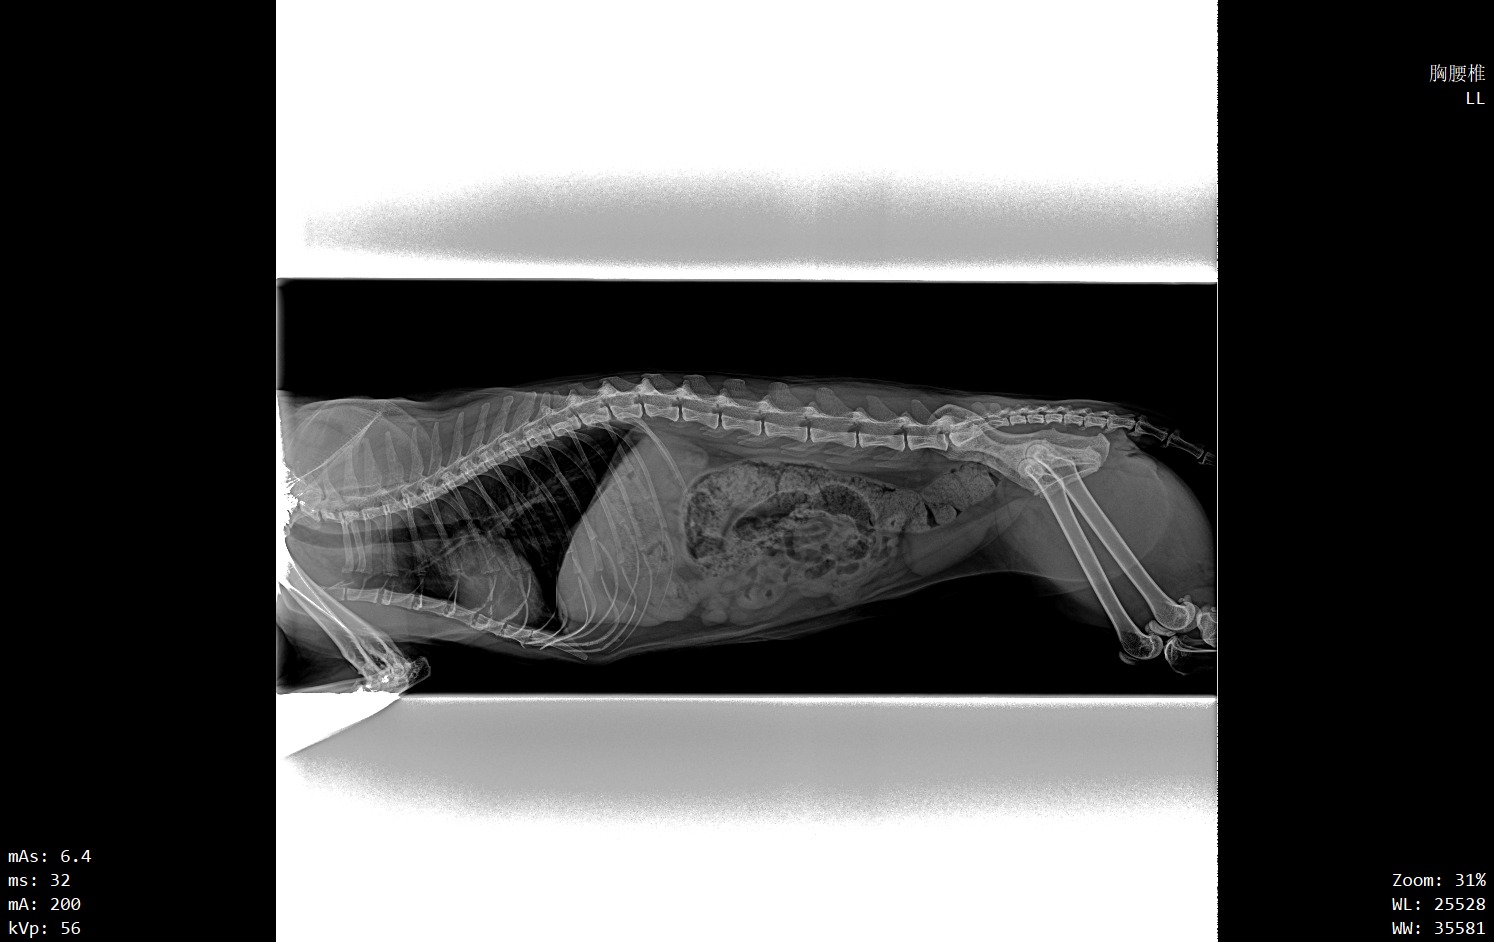
Last issue we met scatter — the part of the beam that bounces off the animal in every direction. How much bounces out is tied directly to how much tissue sits in the beam: the wider the field, the more tissue irradiated, the more scatter — and the thicker that grey “fog” on your image. Collimate down to the region of interest and scatter drops sharply; contrast comes straight back. It is the cheapest single step in image quality.
Second, less dose to the animal
The tissue outside the field never needed irradiating in the first place. Every notch you close is a notch it does not receive.
Third, less dose to the people
Less scatter means everyone takes less — the person restraining at the table and the person back at the door on the hand switch alike.
Three results, one move, zero cost.
02So why is it underused?
Two reasons.
Fear of clipping
A wider field feels safer — clip off part of the anatomy and you are retaking the view.
DR is too forgiving
DR has wide latitude and the algorithms can lift contrast, so a wide-open image still looks passable — and not collimating quietly becomes a habit.
Leave a finger’s width — collimation edge visible all round
Collimate to the region of interest, leave about a finger’s width of margin, and make sure the collimation border shows on all four edges. “Black borders on all four sides” is one mark of a good radiograph — it shows you decided what you were imaging.
Answer to the second: algorithms cannot replace collimation
Software can suppress part of the fog, but it cannot restore the contrast that was lost — and however good the algorithm, it cannot take back the radiation the animal never needed to receive.
03Two habits that go with it
① Align with the light field, and glance before you expose
The bright rectangle from the collimator lamp is your irradiated field. If the light field and the actual field on the image stop matching, the unit needs calibration — tell your service engineer.
② The thicker the part, the tighter you collimate
The thicker the anatomy, the worse the scatter and the bigger the payoff. If a large dog’s abdomen comes out grey on a wide-open field, the first thing to check is not the technique settings — it is the field.
Two seconds for three wins — that trade pays for itself every single time.
A wide-open field saves two seconds and pays three prices.
Black borders on all four sides.
Source:This article is practical technique guidance with no external data cited; “collimation edge visible all round” is a widely used self-check habit for a well-collimated radiograph; whether the area outside shows white or black depends on whether the software crops it, and does not affect the judgement.
IWA Medical · We build DR systems and write our own core software
Questions about veterinary DR imaging? Technical questions go straight to our engineers.